When I mentioned my dreams of organizing the laundry room in the house I was met with a [you certainly are obsessive about organization (and maybe slightly overboard)] look as well as a comment as follows:
“You do understand that the laundry room is behind closed doors and no one ever sees it right?”
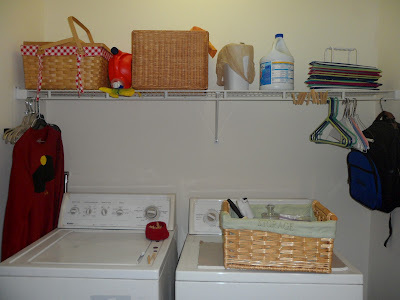
However, the adversity I faced from this comment did not stand between me and my dream of a beautiful, OCD, aptly organized laundry room! First of all, this is the laundry room that evolved over the first year of living in the casa:
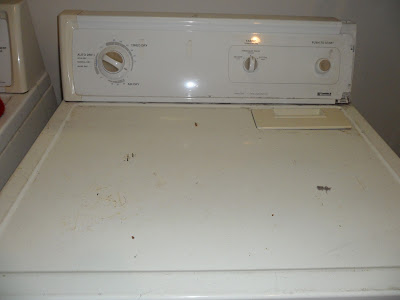
It certainly isn’t too messy (you aren’t able to see the bundles of dryer tubing and old shower curtain rods littering the floor beside the appliances) but it isn’t in tiptop OCD shape. However, I’m sure you are able to notice the incredibly ‘used’ washer and dryer that I’m working with:
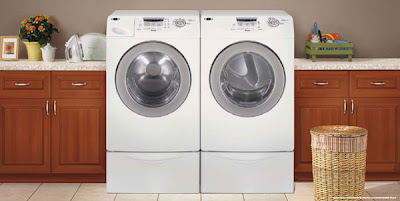
I Craigslisted this baby for next to nothing when I moved in and the washing machine was inherited. They are here to stay until I have saved enough money for my most favorite household appliances ever:
Ah, the happiness those sparkling clean front loader beauties bring me is immeasurable. Also, the fact that they are energy efficient is a major PRO on my list of why I should purchase these appliances.
So, this is my attempt to garner a functional, beautifully organized laundry room with the scuffled washer and dryer I currently own. My first thought was that the one shelf that came with the laundry room wasn’t doing me any favors sitting that high. My 5’3 vertically challenged lifestyle wasn’t loving reaching up to this shelf every time for the detergent. However, as a DIY enthusiast, storage is always an essential component so I didn’t want to limit my storage functions. So the shelf made for Kobe Bryant tall people had to stay. I needed a new shelf closer to my reach. Enter a random piece of plywood I found laying in the laundry room on move in day. All this baby needed was a coat of fresh white paint, some polyurethane, and some hooks and my new shelf would be in business:
Next, I made a list of items I would need jars and accessories for on my new shelf:
-Laundry detergent
-Fabric softener
-Clorox
-Clothespins
-Rags
-Fabric pens
-Lint rollers
-Extra safety pins, needles, threads, buttons
So off to my favorite budget stores I went. I found some snazzy glass canisters at Goodwill for my detergent and fabric softener. All I needed was a just-as-snazzy scoop for the detergent since the simple plastic one that comes with the detergent box simply wouldn’t do. I had some metallic spray paint on hand so I decided a simple spray paint job on an old plastic measuring cup would do the trick.
Here’s the before shot of what I found in the utensil drawer…
….and here’s the ‘snazzy’ after shot once I coated this with some silver spray paint:
I decided to use the same method to an old candle tin I had laying around to store the extra safety pins and buttons:
To finish off my accessorizing all I had to do was find two small baskets and jars we use for canning vegetables in the summer and I was good to go!
I found some small hooks at Home Depot for a whopping $2 a pop and drilled them directly over the washing machine and dryer. (Note: I almost forgot that I would need to open the washer up so I had to readjust where my shelf was going) I placed the board on top, added my laundry accessories, and cleaned up the other random items that were making a home in my laundry room. I was even able to sneak in a picture of Bodie to brighten my day while I'm folding clothes:
I also pushed the washer and dryer close together as they did in my inspired laundry room pictured above. This cleared space for me to add a cleaning “nook” where I am now able to store my vacuum and brooms (which clears up room in my coat closet that I plan to organize in the [hopefully] not too distant future). I found a few hooks that I wasn’t using anymore and drilled them into the right side of the laundry room to hang these items. And abracadabra – an even more utilizing laundry room:
My final task was putting some fabric remnants I had leftover around another piece of board I had found laying around. I turned the board over and wrapped it as you would a present and stapled the fabric to the board:
I placed my newly styled board on top of the dryer to hide some of the rust marks and to create a cleaner space to fold my clothes as I take them out of the dryer:
So there you have it! My organized laundry room that apparently I will only see since it is behind closed doors. But it will make me happy since it is neat, organized, and fully functional for a shorter person. Enjoy!
Before....
After...
I would still love to add some trim to those wire shelves and of course add some artwork on the bare walls. And I think a stencil would look just lovely on those walls (once I get those frontloaders!).
Here’s the budget friendly break down:
-Plywood = free (found in the house)
-Paint = free (leftover from painting the office)
-2 hooks = $4 total @ Home Depot
-Fabric = free (leftover from DIY headboard)
-Metallic spray paint = free (had on hand)
-Canister for detergent = $2 @ Goodwill
-Jar for fabric softener = $2 @ Goodwill
-Measuring cup = free (had on hand)
-Candle tin = free (had on hand)
-Jars for clothespins and Clorox = free (had on hand)
-Baskets = free (had on hand)
Total budget for laundry room organization project = $8.00
Picture of beautiful laundry room with jaw dropping washer and dryer found here.


 I wanted to add some pizazz to the stump on the right so I purchased the Rub 'n Buff for that! This stump had worm trails and although I found it gross at first, I quickly learned to like it and ran the Grecian Gold color throughout these markings using Q-tips, my fingers and an old cloth. I also covered the entire top of the stump with the gold...this stuff is like a paste so you have to push and work it into the stump. Once the gold had dried, I started the sealing process on this stump too. I keep these beautiful stumps in my apartment for seating or for decoration. I just love them. Courtney and I have also used them at our Storm Squad Hoedown party in the fall.