Thursday, January 26, 2012

Kiss & Tell Birthday Party!

Leigh quickly became one of my bestest friends after we were introduced through a mutual friend about 2 years ago.  It was her birthday on Monday and so her roommate Bree and I decided we wanted to do something special for our little nugget this past weekend.  Because Leigh is always making kissy faces in photos and such, Bree thought to make kissy lips on sticks for everyone to hold in pictures (similar to the mustaches or santa beards which you may have seen at some of our other parties).
This idea inspired the entire theme for our party.  The next day I had a serious shopping spree at the Dollar General. Perfect enough for me, they had put out all of the Valentine's decorations and so I found everything I needed and more.  I bought pink and white paper lanterns (2 lanterns per pack), purple and pink streamers (2 rolls per pack), pink and white balloons, kissy lip chocolates, kissy lip foam sheets (2 packs-6 in each), and hot pink wrapping paper. We decorated the door with a "KISS ME" scrapbook paper sign and a little foam kissy lip with Leigh's name on it; streamers and balloons also hung from

the piping above my door.  The picture to the right is a bit of what Leigh saw when she walked in.  The foam kissy lips were put all along the back wall with "Lounge" for the kissing lounge (although I don't think it saw any action).  I hung "Kiss This" in large letters with jute from window to window along with hot pink wrapping paper fans.  The purple and silver tissue paper pom poms you see in the picture were hung by twine on a piece of jute that ran from one side of the room to the other along with streamers.
It definitely helped decorate the room and filled my 10 ft ceilings and empty space with some color!  Above the fireplace we strung a Happy Birthday sign (bought from the Dollar General) and hung streamers from an empty picture frame that was just propped up on the mantle.  Everywhere else we decided to just throw up as much color using streamers.  We hung lines of
streamers from the bar table, the bar leading into the kitchen, the table near the entrance of my apartment and hung paper lanterns over top of the bar.  Love it!

We didn't ask people to come over until a little later so we thought it only perfect to have sweet treats around the house rather than the normal party snacks.

Menu:
"Kiss & Tell"- Fortune Cookies and Chocolates
"Frenchy Fondue" - With Strawberries, Marshmellows and Graham Crackers
"Strawberry Kisses" & "Birthday Cake" - Cupcakes
"Pucker Up Margs" - Watermelon Margaritas
"Juicy Lip Jello Shots" - Pineapple with Coconut Liquor, Pineapple with Tequila, Strawberry with Liquor...All topped with whip cream and sprinkles.

On the bar table in the living room, we had a "kiss & tell" table with fortune cookies, hershey kisses, and the kissy lip chocolates I got from the Dollar General.  Leigh got her palm read the previous weekend so we thought it would be cute for everyone else to get a little fortune of their own!

In the kitchen we had an assortment of sweet treats.  We laid out brown paper across the kitchen counter so that we could write on the paper and it could get as dirty as it wanted and we could just throw it away.  We had our "strawberry kisses" and "birthday cake" cupcakes taking up almost half of the counter space.  There were too many but they were too good.
Next to the cupcakes we had our "frenchy fondue" equipped with dipping sticks for the strawberries, marshmellows and graham crackers.  It was quite the tasty snack for the grazers that roamed in and out of the kitchen.


A specialty drink was whipped up for Leigh's party guests as well.  We called them "pucker up margs".   To make this scrumptiousness, we used 2 cartons of Dole's Watermelon juice, a bottle...or two of tequila (clear), half a bottle of triple sec, a cup of water, and 4 freshly squeezed limes.  DELISH.

All in all, it was a sensational evening and I think everyone had a fabulous time celebrating our much loved friend, Leigh!


<---B-day girl Leigh and I (twins?!)


Monday, January 23, 2012

Hello Dramatic Curtains!

My apartment has the most beautiful windows.  In my living room alone, they practically take up one entire wall stretching from the ceiling to behind my couch. Beauty has a price though and my price to pay were for curtains.  I guess I never realized how expensive curtains can be and with my windows being so gorgeously tall, no standard size curtain would cut it...I guess you could make it work but I wanted dramatic curtains, not high-water blah curtains from the store.  I went to the fabric store and again, I never realized how expensive these custom sized drapes I would now have to make were going to be.  To reach the entire length of the window to the floor, each panel would have to measure 113", the outer windows are 28.75" wide, the middle window is 47" wide, and from the top of the window to the window sill is 83"....I am working with some weird measurements.  I started doing my research online and found that I would end up paying a ridiculous amount of money since most of the time the curtains are only sold with one panel and I needed 8 at extremely long lengths!


My Challenge: to create really standout curtains without spending an arm and a leg on them since I am only decorating an apartment, not my dream home, and who knows how long I will even be in this gem of a space.  I wanted the curtains to be beautiful, eclectic, light, and cheap.  
The Verdict: use Burlap!  Mom was the one who mentioned it and at first thought of it (potato sack races in the backyard) I somewhat frowned.  The fabric isn't soft, it may not block out light, and it won't fit my space.  I was wrong on ALL accounts (well maybe not the fabric is soft part but who is going to be rubbing up against my curtains anyways?).  I didn't like the color of the burlap at my local fabric store so I started searching "cheap burlap" online and found the Online Fabric Store.  There were so many different styles and colors of burlap to choose from (who knew?!) but I ended up siding with "Natural Burlap".  I was able to purchase 30 yards at $1.70/yard of fabric for $51 and with shipping it came to $64.49.  What a steal!  I then bought Nickel curtain rods and clips from Target.  I had 8 curtain panels total across the windows (2 panels on the outer windows and 4 panels on the middle).  For the outer windows, I used 28-48" curtain rods (2 @ $4.99 each) totaling $9.98.  For the middle window I used the 48-84" rod totaling $7.99.  The prices online are a lot more than what I paid in store so I would check both places before making your purchase!  For each curtain panel, I used 7 Nickel colored clip rings.  Each pack contained 7 so I had to buy 8 packs of these clips for $39.92 total.  


These curtains were a very quick project because sewing wasn't even involved.  I simply cut the burlap to the desired length taking into consideration the fold at the top.  When I say fold, I literally mean it....rather than sewing, I folded the fabric down to create a nice smooth line at the top and then put the curtain ring clip right on top of it.  For as easy as this project was and for as good as these curtains look, people think I spent a ton of time and money on them.  


All in all, I think my curtains turned out absolutely stunning.  They were affordable since I made them myself and didn't use expensive fabric for custom drapes.  


Curtain Project
Costs:
Fabric - $64.49
Clip Rings - $39.92
Curtain Rods - $17.97
Misc:
Time - Less than an hour
Tools - Drill and a ladder


Total Cost: $122.38


We're linked up to:
Visit thecsiproject.com

Monday, January 16, 2012

Painting a Brick Fireplace

When we were searching for a home to buy one of the things we were looking for was a wood burning fireplace, not gas.  We love the smell and the ambiance a REAL fire gives off and were over the moon when the house we fell in love with had one in the living room.  And to top it off, it was such a statement as it was floor to ceiling brick.  We lived with the red brick for a couple months and I could just never warm up (pun not intended) to it.  I felt like nothing matched it and I wanted a clean, cohesive look.  I used younghouselove.com as my inspiration (who doesn’t?!) and decided a crisp white paint job would do the trick.

All I did to prep was wipe down the brick and scrub the spots where there was a lot of soot.  We had carpets at the time so I taped off some drop cloth on the floor.  I used a roller that is for tough jobs and just started rolling.  The sides were a little tough since they were next to the wall but an angled brush worked perfectly. 
I just used a basic Sherwin Williams paint called Extra White.  It took almost a gallon since the brick soaks up the paint a lot.  You probably would not need this much if you have just a half brick fireplace.  Don’t you love how everything seems so much crisper?  I love it and I feel it is much easier to decorate the mantle with color now.  And I debated painting the mantle but I love how the black looks so much bolder now.
I will let you know that after each winter season we do get a good film of soot around the fireplace opening.  We just do a little touch up every now and then and it works out fine.  The price you have to pay for a crackling fire!


Sunday, January 15, 2012

Tortoiseshell Time

I inherited an extremely ugly side table from the previous owners of the townhouse I lived in throughout college.  It was beat-up, had water stains all over it and just looked old.  My roomies and I kept it that way forever because it always went unnoticed in a corner and since it was our college space, we really put no thought into spending money to redo anything.  I ended up needing a side table when I first moved into my apartment and since I was strapped for cash the table was mine for the keeps but I had to find someway to spice it up!  I had seen a technique several years ago and had literally written it down waiting for the perfect opportunity to whip out this specialtyness of a furniture recipe.


Here is what you need: 
- Piece of furniture
- Base color in latex paint (I used "Cream in My Coffee" by Valspar) @ Lowes
Glaze Mixture:
- 3/4 cup Malt Vinegar
- 2 Tbs. Burnt Umber Powder Pigment (MUST be POWDER)...I believe I used this one. Hard to find in stores but WoodCraft did have a few colors in a brand called real milk paint.
- 1 squirt of liquid dishwashing soap
- Clear sealer in spray/paint form (I used a spray) bought from AC Moore


Here is what you do:
1.) Paint your furniture with the base coat.  You may need to paint 2 coats to cover completely.
2.) Sand the furniture when the paint is completely dry.
3.) Mix the special glaze mixture ingredients together (Malt Vinegar, Burnt Umber Powder, Liquid Dishwashing Soap).
4.) Apply mixture liberally using a small brush.  Try to do sections of your piece of furniture at a time so that the glaze doesn't dry in certain areas before you have time to do Step 5.
5.) Dabble your fingers in the glaze across the piece of furniture.  It's as if you are playing a piano.  Press lightly so you get the desired effect.
*If mixture on furniture is dry before you get to dabble on it, paint over it again...otherwise you will leave fingerprints.
6.) Repeat until the look you want to achieve is complete!  As you can tell in mine, I did the ENTIRE table but you may just want to do the top part.
7.) Spray with a high gloss sealer once the furniture is completely dry.  You will need to spray 2-3 times. *The mixture may have a powdery look when drying on the furniture but that is completely normal and you can spray over top of it.


Total Cost:
Furniture: Fo Free!
Paint: ~ $7 - 1 Quart
Brushes: I have an abundant supply.
Malt Vinegar: ~$3
Burnt Umber Powder: ~$11.50 (with S&H)
Liquid Dishwashing Soap: On hand!
Clear Acrylic Sealer: $7.91
Total: ~$30
*Also necessary: Ability to move your fingers in a piano playing motion & an abundant supply of hot water to shower off all the mixture that flings and dabbles onto your skin!  Dark colored/painting clothes and a drop cloth are all great ideas as well.  My mother and I worked on this project outside in our driveway so we could reduce the risk of a huge mess inside.

Friday, January 13, 2012

Sleep Is My Drug

I've just finished my first work week of training for the half marathon I plan to run in March and it is exhausting waking so early in the morning!  I am the type of person that is so obsessed with a cozy bed that I will hit snooze about 5 times and wake up with barely 20 minutes to spare before I am out the door and headed to work. Sometimes I think I have a problem but I believe there are a lot of people that can relate to me...Because sleeping is a favorite morning activity for me, the art work in my room is completely fitting.  I found the saying on Pinterest and knew I wanted to do something with it.  I took 2 canvases (11x14in) that I had laying around and the extra burlap from my curtains in my living room.  I used my mini hot glue gun to secure the burlap onto the canvas.  I then took black construction/scrapbooking paper and cut out each letter to create the saying, "Sleep is my drug, my bed is the dealer...and my alarm clock is the police."  The letters took forever to cut out and they are completely IMperfect but I somewhat dig that about this project; they were also hot glued on top of the burlap.  It all came together on a weekend after a game when I didn't feel like visiting downtown Raleigh. :) 

Wednesday, January 11, 2012

Let there be light!

When we moved in to our house we noticed that our kitchen was lacking in the luminescent factor.  The kitchen basically has track lighting with only two lights on one side (not sure what symmetry they were going for...) in the cooking area:
...And this is the only other light in the kitchen that is above our pedestal table.  There is nothing really wrong with the lamp above the table ascetically but the light goes UP, which does allow a lot of lighting to be on the table.  I decided I wanted something that wasn't so dark either and reflected our style a bit more.
So, the light had to come down.  I got a little help from my fiance, Ben.  He does the fixin' stuff in the house.  He unscrewed the candle part of the "chandelier" and then unscrewed the base plate and cord from the ceiling.
We went to Home Depot for lighting options and I fell in love with the Warehouse Pendant.  I also fell in love with the price: $23.99!  It also came with the whole lighting kit so we didn't have to purchase an extra one.  I love the industrial look of it and I'm really leaning towards industrial chairs like Layla chose for our pendant table....maybe some day!
Ben made sure to turn the power off and went to work attaching the correct wires to the ones hanging out of the ceiling.
And voolah!  Let there be NEW light! 
I love how much more light there is now!  Check it out compared to the one that was here when we moved in.  I feel like the old one looks so dark and outdated when compared to the new pendant light. And I think it is so chic looking!  We did add two more track lights to the ceiling as well for more light and symmetry.  So what do you think of the industrial vibe?  I know it isn't much but I'm certainly getting more excited to more towards that style...
Before

After


Monday, January 9, 2012

Brunch for a Bunch

Since the weather is a little wintry and dreary here in North Carolina - we thought we would reflect back to when we had 78 degree days and the sunshine was abundant!  We held a springtime brunch last April for the Eye Care Associates Storm Squad when the weather was spectacular.
We wanted to host a little something special for the end of the hockey season for our fabulous Storm Squad ladies so we planned a brunch!  Because we are two party planners that aren't trying to spend a pretty penny, we kept this brunch very simple.  Like most all of our events, it was held at Courtney's house because she has the most space for all the little things we want to rope the girls into doing.
 
Our inspiration for this brunch was the springtime season and Easter.  We decided that our seating cards would reflect our theme so we used terracotta pots to mark every one's place at the table.  We bought the mini terracotta pots at Home Depot for $.74 each and planted a spring of lavender into each one.  We had some leftover sample paint that was light green which we used to paint the lip of each one.  All we had to do was write each girl's name with a Sharpie and we were good to go (Kim always does the writing because she has that fancy, beautiful penmanship!)
The rest of the decor was just as simple - we made tissue paper pom poms in fun spring colors and used Easter decorations bought at the Dollar Tree for centerpieces.  We used a floral china pattern from Target that looked springtime enough and placed the pots on the center of each plate.
We set up a little drink station as well for our pomegranate mimosas and bloody mary's.  We just attached pretty labels to the pitchers and set them out with our champagne flutes.  Since we had 14 girls at the brunch, we knew it would be tough to keep track of glasses so we made little tags as well out of scrapbook paper and twine with their initials on them.  
We kept it super simple for the food since we both made all the food for our guests.  We made some monkey bread, cucumber sandwiches, chicken salad sandwiches, and breakfast casserole.  It was all so yummy and the perfect brunch menu.  We had printed out a sweet sign on floral paper and framed it for our buffet line that read "BRUNCH for a wonderful and lovely BUNCH."
The weather that Easter weekend was beyond spectacular so we decided we should include some egg dying so that the party could be moved outside.  We set the porch up with our egg dying station.  We just put down a pastel pink table cloth we had bought at the Dollar Tree and had separate bowls for our different colors.  We used a floral frame to mark our egg dying station - just in case people were confused!
It ended up being so much fun and people made some pretty spectacular eggs.  We ended up loving  doing this - kind of bringing back our childhood!
For our party favors we made to go bags with every one's names attached for them to visit our candy buffet.  We had Easter M&M's, cupcakes, and chocolate covered strawberries and pretzels.  This was a big hit and we definitely needed to go since everyone was too full for desserts.
We couldn't have asked for a better day or better weather.  All in all I think we were especially happy with our results - enough to toast each other!
Hostesses!

Friday, January 6, 2012

Bring it on 2012!

Happy late New Years!

We hope everyone had a glorious and fun-filled New Years this year. It's hard to believe that it is already 2012 and 2011 is just a thing of the past.  We are both super excited about what this year has to bring and can't wait to start blogging/crafting/diying more...that's our resolution!

Before we can jump to the new year, I wanted to share some of the last moments of 2011 I had.  We went to the beach since beaches are around 2.5 hours away from Raleigh and the weather was gorgeous!  Our friends Chris and Allison accompanied Ben and I to his parent's beach house where we rung in 2012 with good friends, family, and FOOD!  Bodie had a blast jumping off docks, swimming, playing on the beach, and hanging out with his bestest friend Chris (I think it goes both ways for these two).

For our shingdig we all made different appetizer plates and everyone just dug in.  I ended up making a cheese board from a scrap piece of wood from work.  The guys in the shop actually brought me this beautiful piece of wood that was sanded down and they even rounded the edges for me!

My friend Catherine had made a chalkboard cheeseboard at our hoedown party which was adorable so I set off to make one as well.  Of course I applied my most favorite product......
I think it turned out pretty cute!  Ben and I absoutely are obsessed with wine & cheese/italian meat spreads so this was my contribution to the dinner board. 
All of the appetizers were spectacular and certainly hit the right spot!
I made a pretty simple tablescape and made allowed Ben & Chris to help.  They cut out letters and didn't understand why we were making a banner that read this:
I know I'm not the only one who knows that this is the song you sing for New Years!  We had a bet about how many people at the party would understand this banner and thank my lucky stars there were a lot of women there to back me up.  I mean come on..."Should old acquaintance be forgot,
and never brought to mind?"

Here is a picture from the tablescape.  The quote in the frame was adorable.  I found it on pinterest and it read, "On New Year's Eve I want you to kiss me.  Kiss me at 11:59 and do not finish that kiss until 12:01.  Therefore, I have a perfect ending & definitely a perfect beginning. " The boys thought it was so sappy but I thought it was the sweetest thing ever.  I just used gold, silver, and purple ornaments I had leftover from Christmas decorating and spruced up the party.
For party favors, I just filled up quart sized mason jars and put some black eyed peas in there with a tag that read "Good Luck in 2012." 
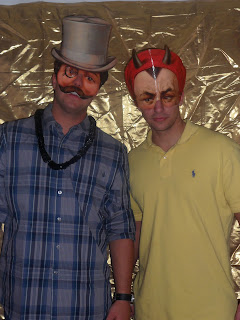
I have to say the highlight of the evening was our makeshift "photobooth" we had.  We wanted a place where everyone would take pictures since it would encourage picture taking and we wouldn't end up with one picture the next day from the whole night.  We just hung up the gold tablecloth we had used for our Tacky Sweater Christmas party decorations and Allison made lips & staches from construction paper and twigs (I forgot the dowels at home!).  We also had some hilarious masks that Ben's mom had on hand.  I think we can say we took advantage of the photobooth and had a little fun...
Bodie was a little too tired from all the beach play to be a good photobooth partner!


Well I hope everyone enjoyed their NYE as much as we did!  Can't wait to get things rolling for 2012.  Bring it on!